Love yourself cardigan

Hi everyone,

Gosh it has been such a long time that I have written on here. I’ve been extremely busy pattern writing and have put out the patterns for my Candy Cowl and Criss Cross Gloves which you can find on Ravelry and on my Etsy page. The Criss Cross Gloves were a Christmas present for a friend, actually the same person who asked for the Smiths scarf and so were designed to match! These light but snuggly gloves can be made over a weekend and make a light layer for these chilly spring days, although I’ll admit with the blizzards we’ve been having in the UK recently you might need something a bit heavier!

The Candy cowl caused many a giggle in my crochet group in Cambridge. I was given the yarn as a present and thought it had to be made into something bubbly and super girly. However I don’t have a tendency to wear things that are super girly, so I spent a few weekends telling my friends how much I would never wear the cowl. I then proceeded to eat my words as it is soooooo cosy that I have worn it every time I go to the gym. As usual it’s the spontaneous projects that you tend to get the most use out of!

In my ‘real life’ I am nearing the end of my PhD so am finding myself crocheting with bleary eyes. I’m aiming to finish this summer so am sitting writing this now while in my office (on a Sunday by the way) in between paragraphs of my thesis. In the past few months I’ve also managed to set myself up on Ravelry, am trying to link that to my loveknitting profile and am basically becoming a tech/pattern organisational guru.

Fotor_152070477885842

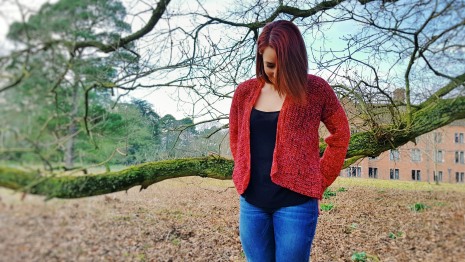
I wanted to tell you about the love yourself cardigan, my latest pattern which I only finished making during the week! This is made from my hand dyed yarn, which I actually made first as a bit of a dying experiment, then had to dye up a lot more of the colour once I had realised I wanted to make this cardigan with it. The colour is a blend of pinks and maroons which I absolutely adore. The pattern is called love yourself because I found myself reading the valentines addition of Inside Crochet magazine and thought, “screw valentines day, I’m making something to show myself how great I am”! So what better than a heart coloured cardigan that can hug you all day long! I am thinking of writing a dye pattern to make up this yarn yourself if anyone is interested. Otherwise you can make it with standard 4ply yarn using the tension shown in the pattern.

Anyway, keeping it brief today. I’m flying off to present at a conference in Utrecht tomorrow so I better get back to being stressed about trains/flights/standing up in front of an awful lot of people and pretending like I know what I’m talking about.

Hope to talk soon, keep an eye out for my #loveyourselfcardigan pattern!

Ells

xx

The Smith’s Scarf

Hi everyone,

So great to be back on here. I feel like I’ve been doing some great crocheting lately,IMG_4743 which of course for me means I’ve been working on lots of different projects! The Smith’s scarf is another design (similar to the Alicia headband) that was requested by a colleague of mine. He wanted a slightly manlier copy of my Fog Break shawl which I often wear to work as a scarf. He specifically wanted this in a black speckled yarn so we sat down together, did some online shopping, drew some sketches and the Smith’s scarf was born!

If you have a look back, the Fog Break shawl had some lacey panels which I ditched in favour of some stripes that split up the triangular stitch pattern. I tried to convince my colleague to let me use a contrasting yarn for these stripes (I might still try this) but he insisted he wanted “all black, just black with flecks”. Actually I think he was right and it looks great in “just black with flecks”.

What I also realised is that I would never have considered making or buying a black scarf but actually this looks great and now I desperately want one for myself! Unfortunately I didn’t managed to get many great photos of the black version. I gave it to its rightful owner and have been meaning to get it back for photos but he is holding onto it tightly…he must know I have my eyes on it…

IMG_4746

I have since made a second version in a blue tweed as a Christmas present. This is the scarf that you can see in the photos (none of the presents I make stay a secret). The blue was made with Womens Institute Aran tweed which I picked up a few weeks ago. I bought two balls of the mustard colour (I love mustard sooo much) and one of the blue although haven’t figured out how to use them yet. Now I think I might just make scarves with them and give them to everyone I know (or keep them for me!).

The pattern is on my Etsy, which you can access from the link at the top of my page. Please have a go and show me your pattern with #Smithsscarf.

Happy making!

Ells

x

Alicia Headband

Hi all. Wow it’s been a long time since I posted last. I have finally hit the last year of my PhD so it is all work and no play for me at the moment. Ok, so it’s not entirely no play, I am still managing to find some crocheting time.

IMG_4117

This headband was requested by a colleague of mine. She wanted a headband for the winter but struggles with itchy wool and finds that she is often too hot in heavily knitted headbands and hats. She showed me a photo that she had found of a headwrap (from the looks of it, it was a piece of knitted fabric wrapped around several times…is that called a headwrap?) with a knot at the front. We figured out exactly what she wanted, something light and easy to wear, and this design was born!

Obviously my first stop was cotton, for a light and comfortable knit. I had previously used Sirdar Cotton DK for a top and absolutely loved the sheen of it. It also has quite a nice amount of stretch in it, which is perfect for a headband! To create the wrapped knot effect I used a concept that I have seen a few times in chunky crocheted headbands. The basic idea is to make two interlinking circles then, folding these circles back on themselves, stitch the two circles of fabric together. When you are wearing this you will essentially have one circle of fabric on each side of your head, with the seam at the back and the knot at the front. Hopefully this will become a bit more self-explanatory when you have the product in front of you! This pattern really is very easy, and gives such a gorgeous effect. I am already planning on making another one for myself!

IMG_4248

So lets get on with the pattern! I hope you enjoy, and please please please tag me on Instagram in any pictures. I would love to see how you are getting on!


Materials:

1 x Sirdar Cotton DK

6mm crochet hook

Scissors

Yarn needle

Pattern:

This pattern is written in UK terminology and is for a head size of around 56cm. This can be adjusted to fit your head, just keep the number of stitches in the foundation chain even.

Abbreviations (UK):

Ch: Chain

Dc: Double crochet

Tr: Treble crochet

SS: slip stitch

Sk: skip

Loop:

Ch64, SS to start making sure chain does not twist.

Round 1-2: Ch1, Dc in same stitch. Dc in each stitch around twice without joining between rounds.

Round 3: 2 Tr in first Dc, (Sk 1, 2 tr in next stitch) around.

Round 4- 7: 2 tr in space between 2 tr pairs from previous row. Work in the round for 4 rows without joining between rounds.

Round 8-9: Dc in each stitch around twice without joining between rounds.

Tie off yarn and weave in loose ends.

Ch64, thread chain through previous loop and SS to start making sure chain does not twist.

Repeat rounds 1-9 on second loop.

Tie off yarn and weave in loose ends.

Sew up:

Hold two loops apart, with join in centre. Fold loops together and join with SS at ends.

Weave in loose ends.

Too Hot for Autumn

A lot has happened since we last spoke, but the most exciting is that I finally got some ink! I had been planning my tattoo for a while (check out my Instagram for a little glimpse) and finally my lovely sister agreed to go with me so I couldn’t chicken out. I want to say that it didn’t really hurt, but I was quite ill at the time so it was battling with a lot of other aches and pains I had. Oh and I had about 48 hours of painkillers to hold my hand. Either way, yes I think I am now an addict, and yes I do want to get one that has something to do with crocheting…skull and hooks anyone?

The other exciting news is that I finally have a finished project! I have been working on so many things for so long I thought I would never knuckle down and finish one. I have finally managed to get on track, focus on one thing at once and here we are! So today I am going to talk about the gorgeous Fog Break by Kat Goldin. I have used one of Kat Goldin’s patterns before and I am always enamoured by their style and those little hand drawn diagrams! It is great to see this style throughout the Crochet Project’s shawl book 3, where this pattern and other gorgeous shawls I am destined to make can be found. This book gave me the perfect opportunity to try out some of my hand-dyed yarn. My yarn is a 4ply merino wool and nylon sock blend, making it perfect to create the drape needed for these shawls.

IMG_3626

The colours I chose were quite different to the original foggy greys within the pattern. I started making this shawl a few weeks ago when it seemed Autumn was just around the corner so the bright orange of my Cinnamon blend and the yellow specs in my Pumpkin spice colourway seemed very seasonal. I also wanted to add a contrasting colour and so dyed up a new colourway that I am calling foxtail. My first two colours reminded me so much of leaves at the beginning of autumn, when they are still bright yellows and oranges. I wanted this new colour to reflect autumn coming to an end, with deep browns, dark grey specs and red highlights.

The majority of the pattern is worked in a simple triple crochet stitch pattern, the lacework of the contrasting panels is created using a broomstick stitch. This is something I had never tried before; the technique uses a knitting needle to add and remove stitches moving across the row. The pattern suggests that a large amount of blocking is needed to open up the stitches but, even with this, my first attempt looked much smaller and more closed than the pictures in the pattern. I rummaged through my crafting collection and found another set of needles and ended up using both a 10mm and a 6mm at the same time to create a similar effect to that seen in the pictures (if not a little smaller still). Of course, holding two needles together was a little tricky at first but once you get the first few stitches on they do most of the work for you.

I also decided to use my contrasting foxtail yarn to double crochet around the edges to IMG_3625
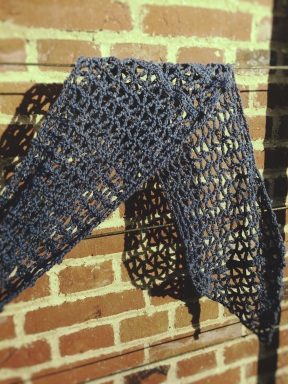
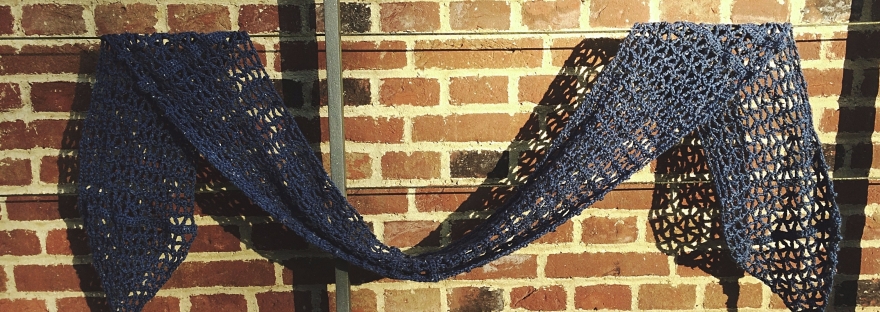
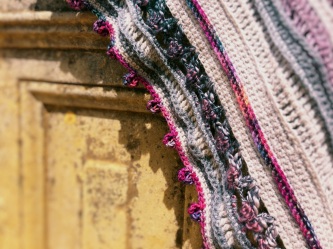
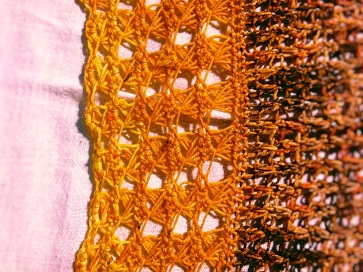
tie the piece together prior to adding the lacework top. The tension of the lacework created a ruching effect with the rest of the shawl and the shape of stitches meant that there wasn’t one straight edge between the panels. Adding an edging created one line from the top to the bottom of the shawl. According to the pattern, this straight edge could be created with an aggressive blocking strategy. But since I am not good at blocking (I don’t enjoy doing it and I don’t have the right equipment for large pieces like this) I used this border to straighten up the edges before blocking with pins.

I loved making this shawl. The pattern is simple, the shape is gorgeous to wear as a shawl or a scarf and the colours have me ready and waiting for autumn to begin! Of course this weekend we are seeing gorgeous sunshine so maybe I was a bit too keen with wishing for Summer to be over. The only drawback is that pattern comes as part of a book so it is a little more pricey, but with this book you get so much for your money. Actually I found my favourite part, better than the gorgeous 5 patterns, is the introductory section about shawl design! I have learnt so much from this book and if you wanted to try designing your own shawl I would highly recommend it. If you want to have a go at making this yourself, check out my shop for my yarn or dye your own! You could still get something gorgeous and Autumnal before Autumn even starts!

Ells

xx


Capitaine Crochet

The keen eyed amongst you might notice my posts have been scattered of late. This is because I have been a bit of a disorganised mess recently. Much like Bilbo Baggins once said, I feel like “butter spread over too much bread”. You can probably see this in my complete inability to show you a finished project. I have spoken a bit about my constant WIP before, the bohemian granny square cardigan (Squares and squares and squares), but my addiction to the foundation chain has now left me working at my dining table surrounded by wool. I find (and I would love to know if anyone else has noticed this) that my crocheting habits mirror my life’s ‘goings-on’. I am going through a restless few months, my work is like a treadmill, if I rest I fall off the edge, and at home my evenings are filled with other small jobs to bring home the facon (vegetarian bacon). So ‘fast-paced’ and ‘caffeine fuelled’ are my new synonyms; not the most relaxing environment to unleash my creativity. I am hoping all of this goes some way to explain my four current WIPS (six if you count the two patterns I am planning to start). Let’s walk our way through them, starting at the oldest ones that leave me the most guilt ridden.

Obviously, we have to start with the granny square cardigan. Frankly I think I have made maybe five more squares since I last spoke about this. However, I recently moved on to a section with a new square pattern that held my attention for a whole day a few weekends ago! You may have seen the gorgeous (to look at, irritating to make) 3D flower pattern on my Instagram. I really thought this would inspire me to finish this project, but alas. I was distracted by seeing Make & Do Crew patterns on the LoveCrochet independent designer takeover. Jess posted about a corner-to-corner tiled stag blanket that would be perfect for my sister and her fiancés house! I also can’t resist a new technique, and C2C really is so amazingly versatile that it has shown me how I could put into practice a few designs I have had floating around my head.

IMG_2980

I had been working through this pattern at a good pace, until this weekend when I decided to start another project using some of my hand-dyed yarn. The pattern I had in mind for this came from the gorgeous Shawl Project Book 3. The pattern itself isIMG_2981 
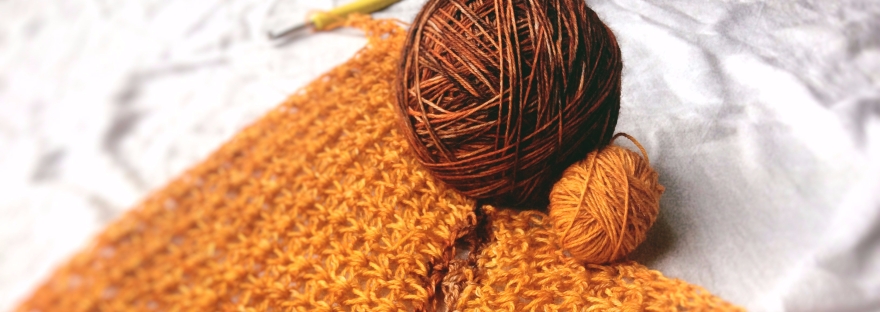
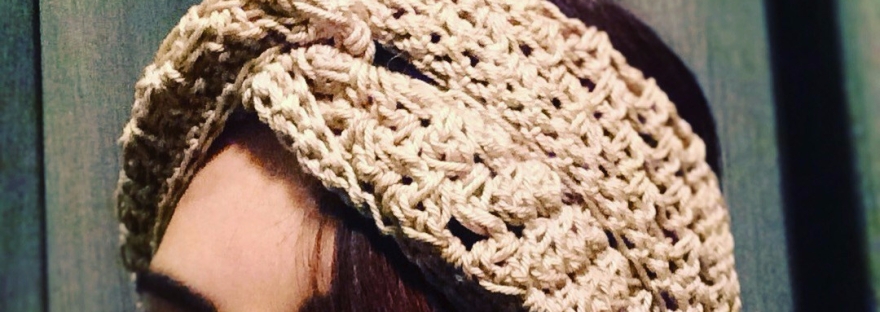
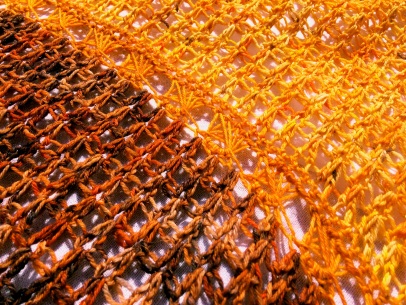
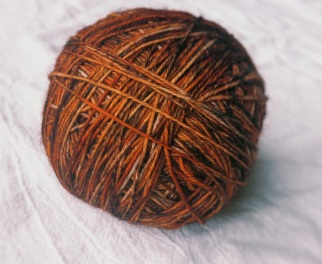
incredibly simple and is summarised on one A4 sheet, which always draws me to a project. It uses a fascinating technique to create what Kat Goldin describes as Broomstick lace. Not completely unlike Tunisian crochet, it uses a knitting needle to hold stitches as you move back and forth adding and removing loops. Currently I am struggling with tension issues with this section but as the pattern recommends an “aggressive blocking” strategy I am fairly certain this will sort itself out. This pattern also required a contrasting colour which gave me the opportunity to dive into my dye pots and create a gorgeous reddish brown colour that really captured the autumnal vibe I am feeling at the moment.

With all the excitement of these two new WIPs I have added to the pile, I had completely forgotten about a gorgeous Moroccan tiles blanket kit I bought when out at a craft fair IMG_2979
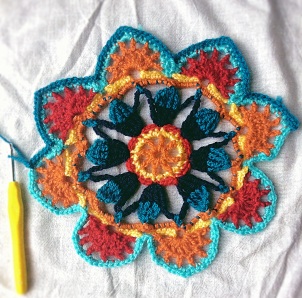
with my lovely Mum. When I moved into my lovely Cambridge home, everything I bought happened to be turquoise and orange. Of course with its blankets and homemade cushions on every chair my home has all the colour of Moroccan tiles but none of the subtlety. I picked up this kit, keeping it aside for a rainy day, but whenever I get a new pattern I can’t help but try it out. I usually promise myself “Just the first two rows”. With this blanket, I got a decent way through one tile before I set it aside to finish another project. There it has sat since waiting to be finished, or I should say waiting to be properly started.

While I type I am also resting my arm on two new cotton based patterns. It is as if my elbow is holding them against the table to stop them from jumping into my hands. One is the ‘Easy Breezy Summer Cardi’ by the gorgeous, inspiring Jessica from The Hook Nook. I want to make this partly because I love the look of the pattern, with its simplicity and elegance. But also partly because I am slightly in love with Jessica…just such an amazing lady. The second pattern is a jumper I saw in HobbyCraft yesterday. I have to commend HC on the rebrand of their knitting and crochet section. They have put less focus on the Women’s Institute brand and more on good value yarn with a great range including some super chunky yarns like ‘Hug it out’ that I am desperate to get my hands and hooks on. While I was there yesterday I found a gorgeous hooded jumper pattern that would be perfect for those colder summer nights. Of course by the time I start and finish it we will probably be way into Autumn, but I can overlook that.

You can probably imagine my house is currently much like Shelob’s lair (apologies for the second Lord of the Rings reference of the day), I am fighting through webs of woollen carnage to get in and out. I wouldn’t have it any other way!

I will leave you with one final anecdote that made my week spectacular. I work with a French woman, and knowing that crochet is French for hook I asked what Captain Hook from Peter Pan is called in the French version of the Disney film. You’ve probably guessed by the title of my post… Capitaine Crochet. There is nothing else to say to that!

Have a great week everyone, and happy crafting!

Ells xx


Dye Another Day

If you read last week’s blog or follow me on Instagram you will possibly be thinking two things. The first being that you are tired of hearing about my corners shawl. Well I make no apologies for that! It has been approximately 5000 degrees every day since I finished that shawl, and since I can’t wrap myself in it to show it off I am having to settle with talking about it incessantly instead! I am happy to say that the pattern is now finished and available on my Etsy site! I have also started to put some of my hand-dyed yarn on there so please check it out and let me know what you think.


From that you may have guessed, I have started dyeing my own yarn! In my last blog I mentioned that I wanted to give it a try. These days I tend to be a woman with conviction, so I have dipped my toe, and my yarn, right into the colourful world of hand-dyeing!

Dyeing your own yarn has so many draws for me. Firstly, hand-dyed yarn is so muchIMG_2454 more vibrant than factory dyed yarn, there is a very visible difference! Dyeing your own yarn is much cheaper than buying hand-dyed yarn which can be a bit pricey. Lastly, if you love a craft compliment as much as I do, it basically doubles that amazing “Oh this? Its handmade actually” feeling. I have to say this little exploratory hobby of mine would not have been possible without the help of the fabulous HueLoco tutorials on YouTube. I found the videos after having a look online to see how easy it would be to start dyeing. I was so surprised at how little equipment is needed and how really anyone with a kitchen and a bit of enthusiasm can do it! So I am going to run through a few pointers for people who are considering dyeing their own.

  1. Watch HueLoco’s tutorials

She has four tutorials that talk you through the basics of dyeing. Starting with solid IMG_2448
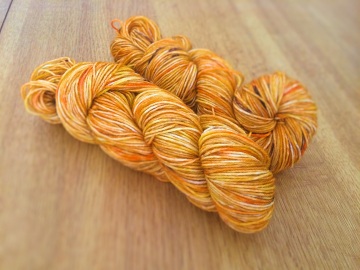
colours, working up to using multiple colours and speckling. She will also tell you the equipment you need. This includes undyed yarn, acid dyes and citric acid. You will also need some setup equipment depending on how stocked your kitchen is already. I bought a large stainless-steel casserole pan, a washing up bowl, some rubber gloves and squeeze bottles. Remember that if you use any kitchen equipment to dye yarn you should never use that again for food, so set this equipment aside for yarn only!

2. Less is more

My first few attempts used far too much colour, both in terms of strength and quantities. I found that when I was using different colours to create variegated yarn. I was too worried about sections not getting dye that I went overboard and often the lighter colours got lost underneath the darker colours. I think the best results start with a little amounts of dye. Try mixing your colours in 50-75ml of water before adding it to your yarn.

3. Keep a notebook

In my ‘real job’ I am a scientist, so keeping research notes comes natural to me. Even so, I really would recommend taking one minute, even while you are waiting for your dye bath to cool, to write down the quantities of each dye you used, how you mixed them, how much was in your dye bath and how you applied the dye to the yarn. This information should help you recreate a skein when you need to.

4. Use shower curtain rings

This sounds like a daft one, but I saw this tip on another tutorial and it saved me a lot of heartache with knotting yarn. If you hook one of these rings onto your yarn before you start, you can use it to transfer the hank at each stage and to hang it up when you’re done. Without this it can be difficult to pick up the hank without accidentally tangling it.

I hope these tips encourage you to give hand dyeing a go. I really think you will enjoy doing it as much as I do.  I promise you there is something so satisfying about watching the colours mix and pulling that hank out of the bath to reveal something truly beautiful. So give it a go!

Happy Dyeing,

Ells xx

Tutorials:

hueloco.com/pages/tutorials

Where to buy:

Undyed yarn – www.yarnundyed.com

Eurolana acid dyes – www.worldofwool.co.uk

Citric acid – www.amazon.co.uk


The Corners Shawl

It really is a great feeling when you finish something you have made. I can now confirm it is an even greater feeling when you finish something you have designed! My corners shawl is something I have been working on for a while and has become a bit of a lesson in improvisation for me (bearing in mind I am usually a thorough planner and control freak); it has certainly taught me to embrace the “que sera sera” attitude. So much so that I will confess the shawl has ended up looking completely different to how I imagined it. But I have loved watching it change and blossom with every row. Soon I will start writing up the mess that is my hand scribbled pattern, this will be available on my blog in the coming days. For now, I am going to tell you a little about my inspiration for this piece and the story of its creation!

IMG_2279

The story starts at Christmas when my mum finished knitting a jumper for my boyfriend. She gave me the two left over skeins of gorgeous Rowan Hemp Tweed yarn in Pumice and Granite and these ended up on my pile of leftovers to use when the inspiration hit. Until my partner and I split up a short way into January; but don’t worry, this isn’t a sad story! One of the things I threw energy into after the breakup was crocheting, my greatest friend who only rarely talks back. Creating this blog has been such an eye opener for me about the kindness of the crochet community and a way for me to vent and hook my way through life’s more stressful moments. Once we had all moved past those miserable winter months (including my Mum who was mourning the loss of her beloved knitwear) it became time to put the mocking yarn that sat on the top of my stash to good use and make it into something positive that truly reflected me! It only seemed appropriate to use this yarn up and make my first pattern for my blog.

I started using the two skeins and another ball of Jaeger superwash MatchMaker yarn that I picked up for about 50p from a charity shop. I knew this wasn’t going to be able to stretch to a whole shawl, but I wasn’t thinking that far ahead. I think starting your first pattern can be intimidating and the ‘blank canvas effect’ can stop us picking up our hook. I had made a few bits and pieces before, but I had never written a pattern with the intention of sharing it. For me the quicker I could get started, the less I could chicken out!

Unintentionally this shawl has become a bit of a story for me. I started crocheting hard IMG_2275
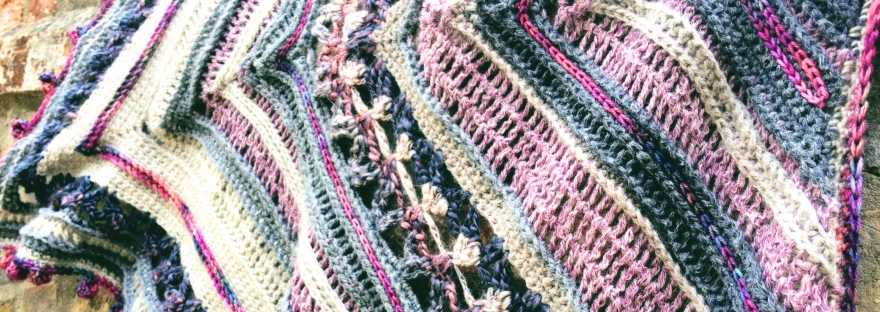
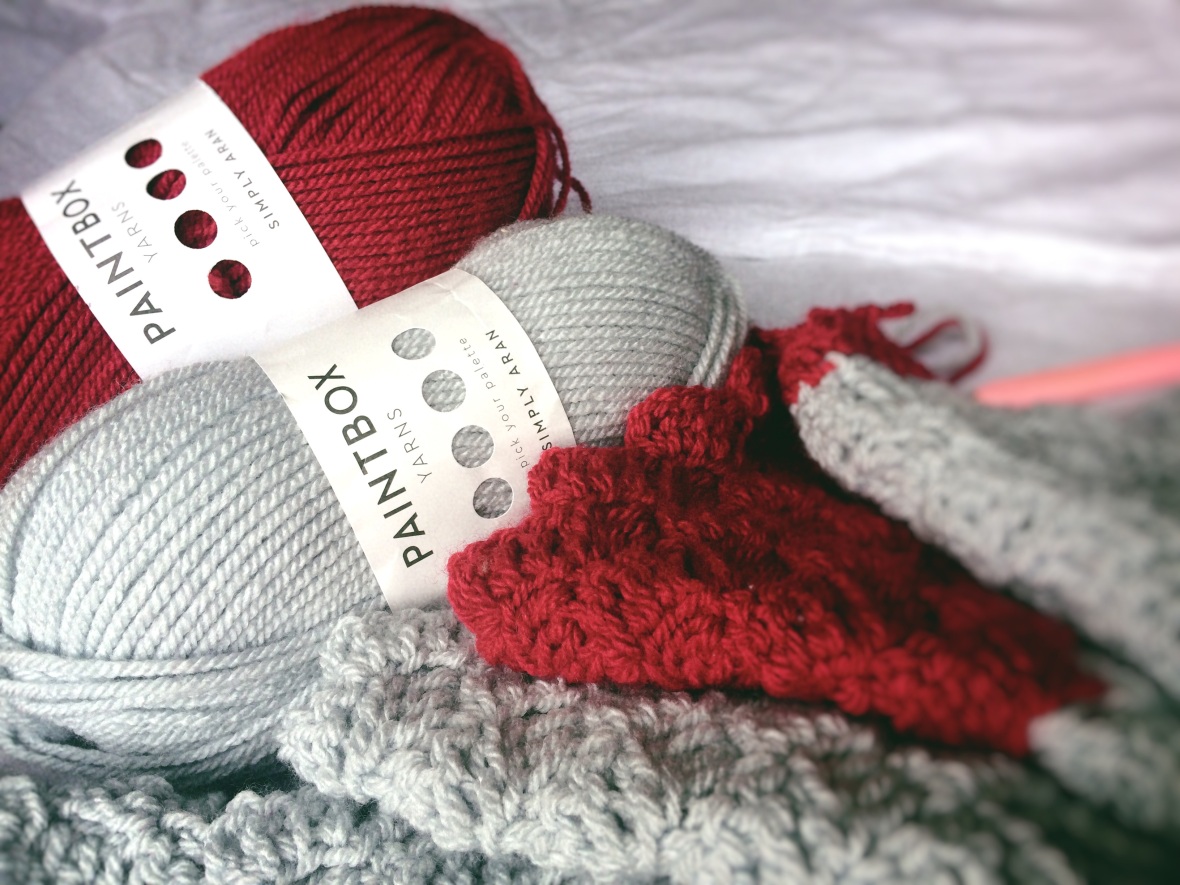
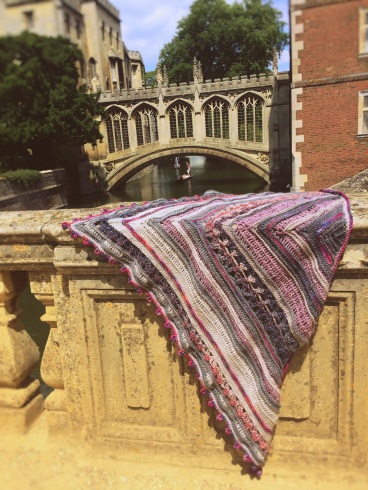
corners and geometric shapes, mimicking my favourite colourful patterns of Kat Goldin and with the finished Soundwaves Cowl from Sarah Knight. These hard shapes lend themselves well to the dark colours and crisp stitch definition of the Rowan yarn; and I hate to say it now but I think that was probably how I was feeling at the time, grey and sharp. But as I ran out of those skeins of Christmas past, I began to interject new, brighter things. As well as including some other leftover yarns I had, like some Robin Acrylic DK in another shade of grey, I bought some WI yarn from their Unique Yorkshire range both of which lightened up the shawl and started to get rid of the moody edge I started out with.

It wasn’t until I started to include some more colours that I that really started to let go and have fun with this, which to me is what designing should be all about! I picked up two skeins of Sirdar Sylvan that I had been looking for a chance to use for a long time. I had never crocheted with this type of loosely spun yarn before and it was definitely a challenge, but it inspired me to create a pattern that was looser and more free than my previous hard edges. The Paisley colour I used moved from pink to a deep blue, and by some miracle this variegation seemed to fit with the length of the row, creating a graduation of colour as I moved from one side of the shawl to the other.

IMG_2276

My favourite addition to this piece (and certainly my most expensive since the other yarns were all leftovers and charity buys) was a gorgeous skein of Rios yarn from Malabrigo in shade Aniversario. Sometimes when I need a bit of yarn-spiration I go to the Sheep Shop in Cambridge. This gorgeous yarn shop stocks so many alternative yarn brands including a range of Malabrigo yarns. I started by introducing a few rows of this yarn and was planning on using the rest to create the border. But it brought so much life to the shawl that all the sharp corners that started off this project began to soften. So much so that what was going to be a straight border became a carnival style bobbled edging. I finished off the piece by running a few lines of slip stitch around some of the grey areas from earlier rows to tie the whole piece together. Looking at it now and reflecting, I can happily say this project has carried me from ‘sharp and grey’ to ‘bobbly and pink’. I am so proud of how it has turned out, and of all that it represents.

IMG_2274

One thing that this project has given me, besides a gorgeous new shawl to get me through the colder summer nights, is a new enthusiasm for hand dyed yarn. To be honest before I started this project I thought hand dyed yarns were overpriced and generally out of my reach. But now I have seen how much it can add to a project. The uniqueness of each skein is something I adore; they allow you to create something truly personal. But more importantly, they are more colourful and vibrant than any yarns from the more common brands I have seen. I have done such a u-turn on this that I have spend a large part of today trying to figure out if I can dye my own yarn! So watch this space!!

Uniqueness is something I want to emphasise with this project. I will write the pattern up to go on my blog in the coming days, but I would treat it as more a series of techniques that, if you want, you can use to create your own version of the corners shawl, and your own story to go along with it! Because I am using leftover and, in the case of the Jaeger yarn, very old discontinued yarns I recommend digging into that stash and improvising too! See what colours you can put together. It is your shawl so anything goes! And of course if you use any of the pieces of my pattern please use the #cornersshawl so I can see all your gorgeous projects.

Happy making,

Ells xx


Squares and squares and squares

Firstly, long time no see! Some of you might have seen that I was in Copenhagen for a few days with work. Such a gorgeous place, I fell in love with the city! But apparently the one hour time difference has caused a massive amount of jet lag, enough for me spend a week neglecting the hook, the blog and the gym! So, enough of my excuses, I’m glad to be back at the crocheting, and the dreary British weather I have come back to is perfect for snuggling under the new shawl. If you have been keeping an eye on my Instagram you might have seen the pattern I have been working on for a few weeks. This will be the first pattern of mine that graces the light of day. Others I have written in the past have stayed as pencil drawings and scribbles on crumpled up paper in the back of my crafting drawer. But I have hope for this one. Don’t get me wrong it is no work of art, it is written over two pieces of paper that have been in and out of suitcase and handbag for the past month. It has food and coffee stains and an entire page that I crossed out then decided I wanted to keep it and rewrote it, but I am excited about it all the same! That is all you are going to hear about this exciting new project for now. In the meantime, I am going to talk about a part of crafting that strikes fear into us all…the dreaded work in progress.

We all have different ways of working through our projects. Some like to work on only IMG_2196
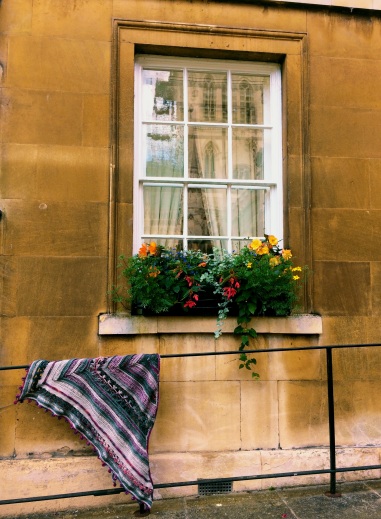
one project at a time. I started this way, thinking I wouldn’t be able to go back to a project once I stopped it. But I became impatient; the lure of new yarns, the excitement of starting those first few stitches of a project, and the overwhelming combination of joy and relief when a project is finished is too tempting. I thought “Oh it won’t hurt to plan my next project now”…”The yarn is on sale, I better get it sooner rather than later”…”It would be good to try the first few rows and see how the stitch pattern feels”…then the next thing I know I am completely enveloped in a new beautiful yarn, while the old project sits in the corner, neglected.

tove_pattern
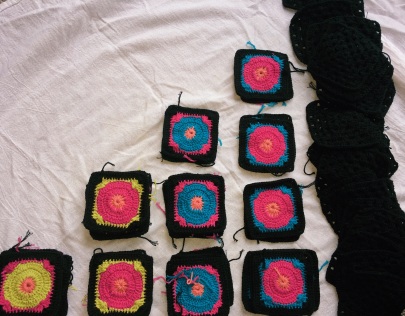
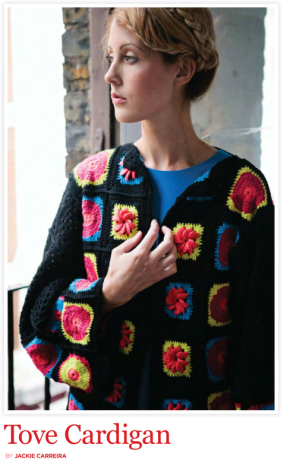
I have one particular project in mind, one that I have been working on for a year. This ‘bane of my crocheting existence’ is a granny square jacket in a Scandi-style issue of Inside Crochet. It was love at first site, and of course this was solidified by the fact that my partner hated it. I had to prove him wrong! But now the joke is on me, because this jacket, made of over 200 tiny cotton squares, is still sitting in pieces in a box on my bookshelf. Each time I finish a project I swear that I will bring down that box. I try and imagine how amazing it will look when it is finished. So I muster the courage, pick up my 2mm hook and cotton yarn that splits every five seconds, and make a square. I feel so proud of myself that I am making progress. Only…199 more to go. Then before I know it I am 3 squares down with a broken spirit, looking on Pinterest for the next thing.

But I have always been an optimist. I know one day I will finish this gorgeous, evil jacket. Even if it is just one square every time I am between projects, in a couple of hundred projects time it will be done!

Keep working at those WiPs!

Happy crafting,

Ells xx

Making Sound Waves

Hi all, I hope you have had a good week.

I’m a little late writing this week, would you believe I was distracted by the Eurovision? My family are slightly fanatical about the annual parade of colour, costumes and people pretending to play instruments on stage. I’m talking homemade score sheets, bunting and lots and lots of alcohol! Fortunately, it did mean I had a lovely relaxed weekend at my parent’s house with plenty of time to finish my new Soundwaves Cowl by Sarah Knight from ‘Crafts from the Cwtch’.

I realise that a cowl is a bit of an odd project to make at the beginning of summer. But with the weather being as cold and miserable as it is I thought I would get some use out of it. Of course, the second I tied off that last stitch the sun came out and it has been gorgeous ever since! So next time you want it to be a bit more summery, just finish off that winter jumper project you have had lying around!

The cowl is made usiSoundwaves_1.JPGng Scheepjes Colour Crafter for the bold colour and CC Velvet for the speckled grey. I chose Coevorden as my accent colour, which looked like almost an olive colour online, but came out a lot more mustard. Actually I love the way the colour worked up! I tend to find yellow yarns hard to buy online because they always seem to come out more creamy than I wanted, so I tried to go for the darker colour here to negate that, and I think it worked brilliantly! My biggest qualm with this yarn is that it is so fluffy, which is great to wear but not so great to stitch with. I think I spent more time untying knots in the yarn and pulling fluff out of my mouth than I did actually making this project!

When I was making this project I was a tad worried that it was going to sit up quite tall and look a little like a neck brace but the fabric drapes really nicely giving it a lot more volume than other cowls I have made in the past which tend to sit quite flat. It is also super lightweight so actually it wouldn’t be an absurd thing to wear even on a slightly drab spring day. Overall this is such a simple and lovely little project to make to add a bit of a colour injection. For me it has been a little two-week distraction from other works in progress that have been looming over me for far too long.

I also want to make a particular point of mentioning that Sarah talks about how cost effective this project is. Most of us craft addicts can’t buy all the luxury yarn that our hearts desire; I sadly can never justify spending my weekly food budget on a hand-dyed, hand-spun yarn made from magical flying sheep. So I always love it when I pick up a pattern that includes a list of cheaper substitute yarns. Most of the time I am that crafter who trawls the web looking at yarn tensions and scratching my head trying to figure out how much I need to try and save a bit of cash! So thank you Sarah for not making me do that on this gorgeous project. It also means you have no excuse to not give this pattern a go!

Talk to you soon and happy crafting!

Ells xx

http://www.craftsfromthecwtch.co.uk/2016/08/Soundwaves.html