
The make I’m going to share with you this week has a little back story. In the office where I work, there are three women. Each of these women manage to completely and effortlessly encapsulate a specific style. Every morning they each arrive dressed in the sort of outfit that would take me hours of head scratching to put together. Unfortunately, they also happen to be some of the kindest and friendliest women I have ever met, so instead of being bitter, I just sigh, look down at my Tesco jeans and swear to try harder tomorrow. One day one of these fabulous women wore a camel cashmere waterfall cardigan over a deep blue dress, and I became a bit obsessed with the colour. I instantly found patterns online to make my own version of the cardigan, but of course they were knitting patterns and my knitting skills are rusty at best, much like my needles. A little later I was flicking through Pinterest and I came across the Granny Cocoon recipe by Maria Valles. It was perfect!
 So I appreciate it is not the sleek waterfall cardigan, but its simplicity reminded me of what I loved so much about that cardigan in the first place! The basic idea is to make a large granny square, fold it like a taco, sew up the edges of the square leaving a space in the corner to create sleeves. I grabbed a pack of the Paintbox Simply Chunky yarn in light caramel and a 6mm hook and got hooking.
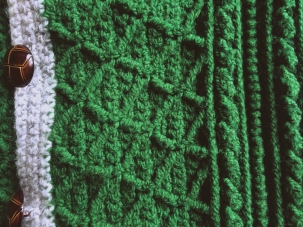
My favourite thing about this pattern is that it isn’t a pattern at all! Maria describes it as a ‘Recipe’, giving basic instructions in how to make your own cocoon but opening the field for personal adaptation. I made my cocoon much smaller than Maria suggests, partly because I was impatient and partly because I am not a tall woman by any stretch of the imagination and I have been drowned in many a cardigan. The stiffness of my wool combined with a slightly smaller needle meant I achieved quite a tight crochet, so I could create a well-structured collar that folded back on itself. An unexpected advantage of this is that, as you may be able to see in the picture, the collar really pulls the material in. This means that while wearing it, the collar runs across my neck and down to my ribs, then disappears behind to the small of my back, allowing the rest of the fabric to drape over it and fall to around my hips. As I said, this was not planned. At first I cursed my impatience for making it too small and wrinkled my brow while I decided whether I should start unpicking. But I reluctantly shrugged it on anyway and found that I loved how it wrapped itself around me. It really did feel like my own Cocoon!
If perhaps you are like me and revel in the chance to adapt a pattern to make it personal, then you should definitely have a go at this ‘Recipe’. Grab yourself some yarn and keep building your granny square, occasionally pinning it and trying it on until it is just the right size and fit for you! This is a great opportunity to play with colour and shape to make something quirky and personal. I am already planning my next one, I’m thinking white with the occasional blue, like a Moroccan tile.
I wore this into work, knowing it I didn’t have the sleek style of my colleagues, but instead having a little handmade quirky style of my own. Although I may not emerge from this cocoon a butterfly, it has reminded me how much I love being a caterpillar.
Ells x
http://www.mariavalles.com/blog/granny-cocoon-shrug-part-2-going-viral


 so large I can use them as dressing gowns, but you might want to opt for a size up if you are particularly worried about this. The second was that when I first added the ribbing to the base, I was far too liberal with my rows and it ended up flowing out like a great skirt, leading to plenty of swear words and unpicking. After this, I kept an eye on the tension of the ribbing throughout and when joining each row back to the base of the cardigan, I worked my rows from every other slip stitch to ensure the ribbing was spaced evenly around. This will be something that is up to each person and their preferences, I would only suggest keeping an eye on things as you go along so you don’t have a lot of unpicking to do at the end like me!